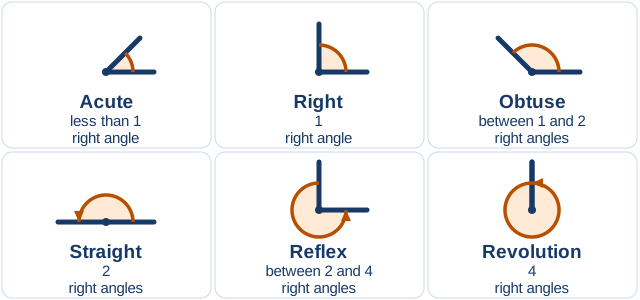
Content description: estimate and compare angles using angle names including acute, obtuse, straight angle, reflex and revolution, and recognise their relationship to a right angle
E1: classifying the interior angles of a range of shapes, using examples of angles to identify acute, obtuse, right and reflex angles
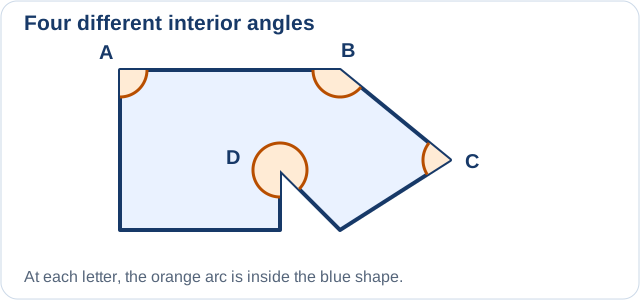
Teach and model: Shade the inside of a triangle, rectangle and shape with an inward corner. Compare each marked interior opening with a right-angle template. Use the four labelled angles in the worked model: A right, B obtuse, C acute, D reflex. At D, explicitly trace the longer arc within the shaded shape.
Student evidence: Draw a closed shape with an inward corner, shade its inside and mark a reflex interior angle. Accept other valid concave shapes; the reflex angle need not be exactly three right angles.
Question and answer: “Can an interior angle be reflex?” Yes. At an inward corner, the angle inside the shape can be greater than a straight angle and less than a full turn.
E2: identifying angles within the environment and estimating whether they are acute, obtuse right or reflex
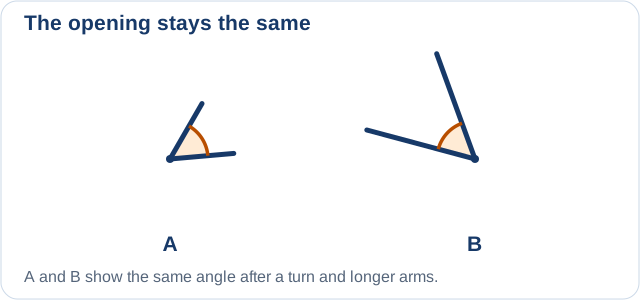
Teach and model: Identify the two arms and the intended opening in a book-cover corner, partly opened card, door viewed from above or a turning pointer. Estimate first, then compare with a template where it can be placed on the same flat opening. A rectangular book-cover corner is right; an opened card can be acute, right or obtuse depending on how far it is opened.
Student evidence: Record a safe object, a marked sketch, an estimate and a checked comparison. Do not infer a precise angle from a slanted photograph of a corner. Choose a flat view or check the object directly.
Question and answer: “Are all door openings obtuse?” No. The angle changes as the door turns, and the marked turn must be specified.
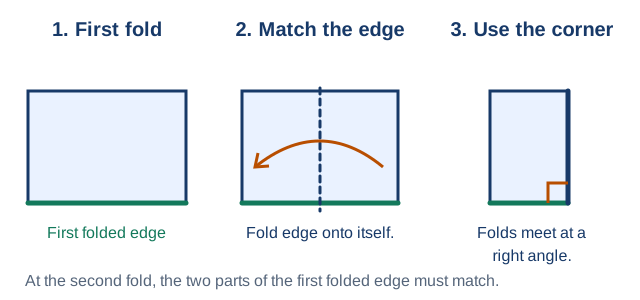
E3: creating a right-angle template using cardboard or a double-folded piece of paper and using it to compare angles in the environment, commenting on whether they are smaller than or greater than a right angle
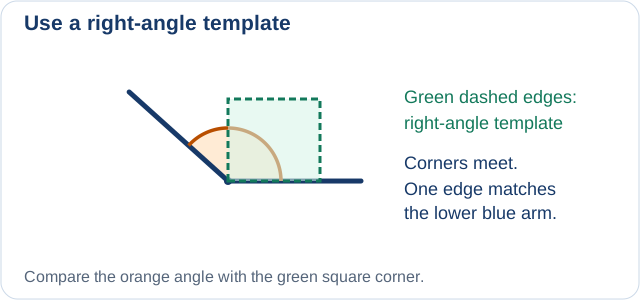
Teach and model: Follow the actual double-fold or checked-cardboard construction above. Demonstrate the two alignments: corner to vertex, one edge to one arm. Let students physically construct and test their templates on two safe flat angles.
Student evidence: Keep the constructed template and the before/after records. A successful check may confirm an estimate or lead to a sensible correction. Naming a tool in a multiple-choice question does not show that the student has created and used it.
Question and answer: “Does a template work on a tilted corner?” Yes. Rotate the template without changing its square-corner opening.
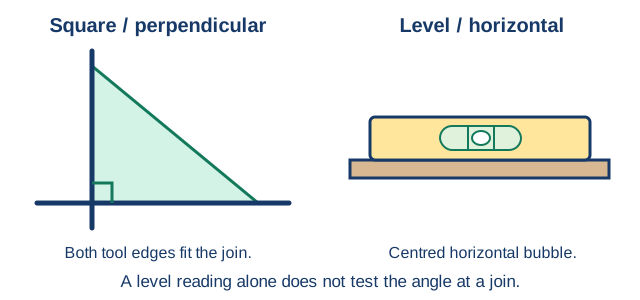
E4: using different measuring tools such as a spirit level or set squares to determine whether lines or objects are straight, square or perpendicular (at right angles)
Teach and model: Use a straightedge to test a drawn line for bending, a set square to test a square or perpendicular join, and an actual spirit level with its appropriate vial to test level or vertical alignment. Model how to place each tool and read the evidence.
Student evidence: A checked drawing of perpendicular lines, both set-square edges aligned, and a supervised spirit-level record with observed bubble position. The written conclusion must stay within what was checked.
Question and answer: “A bubble is centred on the shelf. Have we checked the angle at every corner?” No. The bubble shows level in the checked direction. A square-corner test must compare both directions at the relevant join.